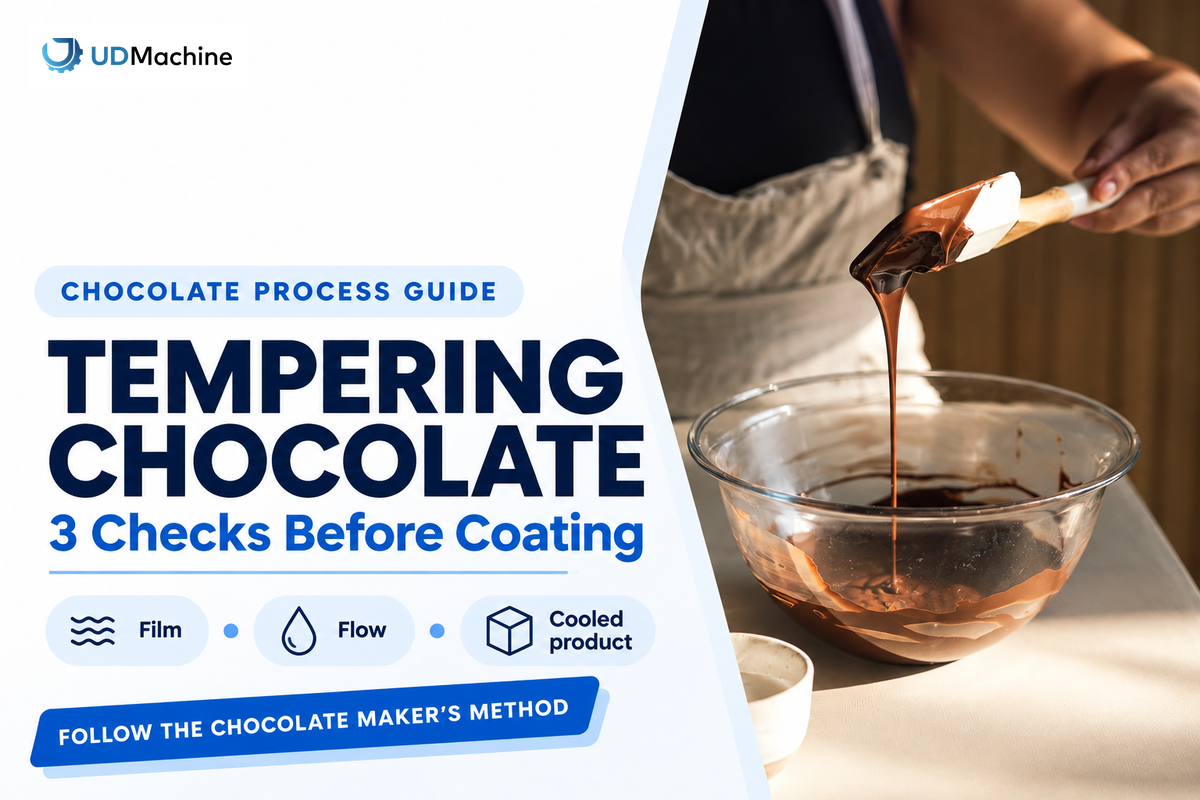
Tempering chocolate lets cocoa butter crystals set with a glossy coat and a crisp snap. Melt the chocolate, develop suitable crystals through a complete cooling or seeding method, and work at the chocolate maker’s specified temperature. Test a thin sample before coating the batch.
Learning how to temper chocolate reliably requires a small trial before committing the full amount of chocolate. Thin films, the flow of liquid, and the finished product provide tell-tale signs. A thermometer reading alone can’t tell if chocolate is tempered. For a wafer coating, a final check involves the wafer and filling: a glossy chocolate bar and a coated wafer may produce different problems.
Updated October 2026
What tempering changes in cocoa butter
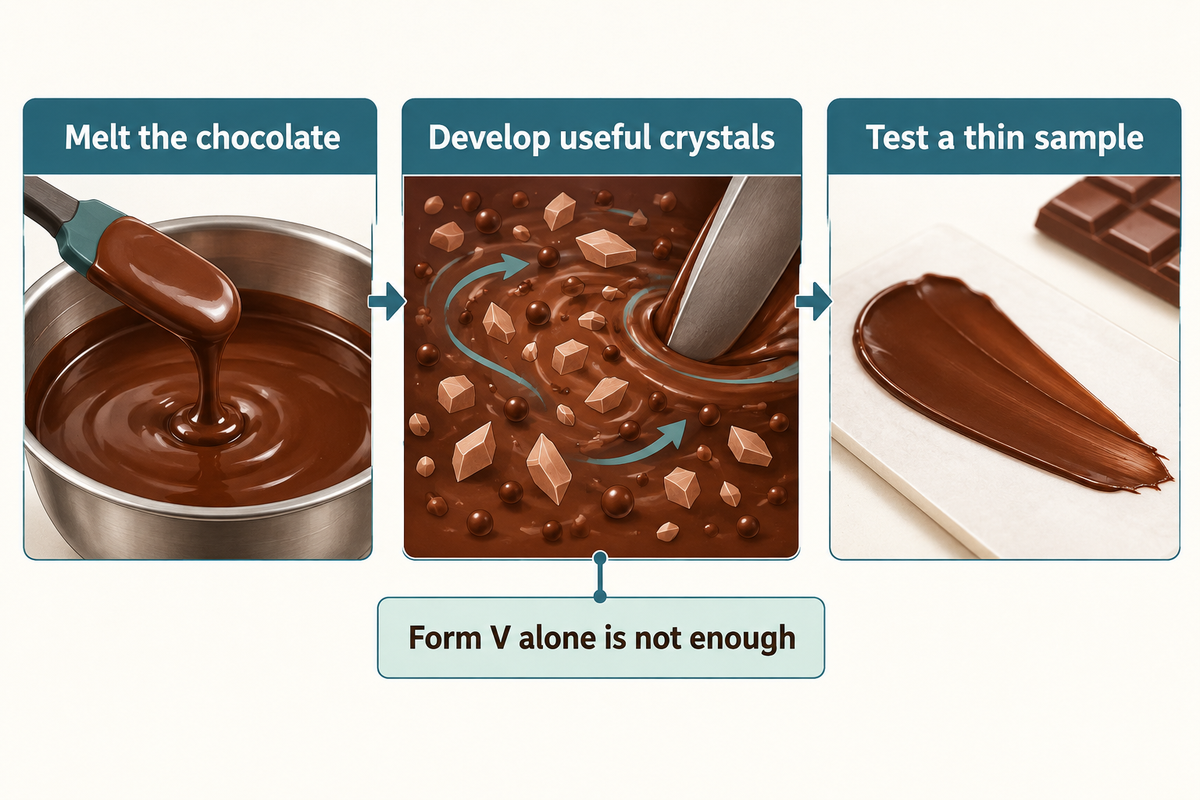
Useful populations of cocoa butter crystals are developed during the tempering of the chocolate. It can be tempting to focus only on Form V, but crystal configuration, and the lipid networks surrounding them, can also affect the final texture. Reaching the target on the thermometer is only one part of the process.
“This Perspective has revealed that Form V alone does not define proper chocolate tempering.”
The 2021 Nature Communications study of minor cocoa butter lipids identified that samples of Form V can still be mechanically and structurally different from one another. This distinction helps explain why a set test is warranted even if the temperature curve looks correct. It further separates chocolate making’s research from an ordinary chocolate recipe made with couverture.
What happens if you don’t temper chocolate?
Untempered cocoa butter chocolate can be dull, soft or streaky and can release poorly from molds. These defects matter when the chocolate itself must form a crisp shell; a ganache is a different formulation because it contains cream. The same expectations of mold release don’t apply to a ganache.
The tempering process controls chocolate crystals through a controlled process of heating and cooling. Simply allowing liquid chocolate to cool won’t reliably restore the correct texture. Cooling chocolate can make an apparently firm surface, but the center can still be mushy. Use the set sample to judge progress and give the chocolate time to complete the chosen cooling cycle.
For a bakery moving between fillings and coatings, label the bowl by formulation as well as chocolate type. “Dark chocolate” is too broad once cream or other fats are added to the chocolate. Our baking science guide addresses effects of ingredients and changes caused by the way a product is processed.
Choose couverture, chips or compound coating
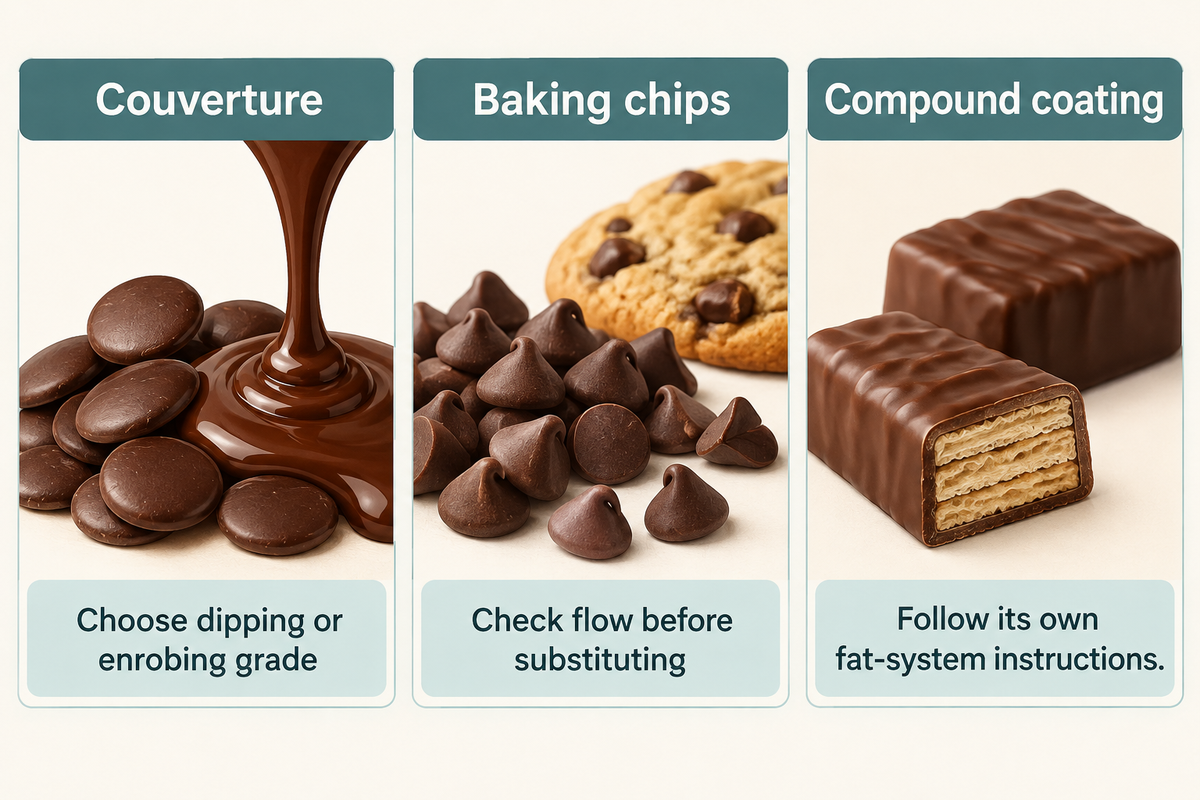
When coating, use a couverture that’s intended for coating to get a thin cocoa butter shell. Compound coatings use a different fat system and should follow their own melting and cooling instructions. Read the ingredients and application instructions before choosing by shape: chocolate chips, drops and bars can have different formulations.
What type of chocolate is best for tempering?
Couverture intended for dipping or enrobing is a useful starting point for tempering a wafer coating. The intended flow is as important as whether it’s dark, milk or white chocolate. A baking chip that holds its shape in a cookie may not work well for a thin coating even with cocoa butter.
As outlined in the Codex CXS 87-1981, sections 2.1.3 and 2.1.6, minimum 31% cocoa butter is required for couverture chocolate, and minimum total fat content of 31% is required for milk chocolate couverture. These limits are expressed on a dry matter basis. Total fat and cocoa butter aren’t the same. The current text includes the 2025 amendment and 2026 corrigendum; these updates don’t give a universal tempering curve.
The Institute of Culinary Education’s recap of a Callebaut-led session highlights the importance of fluidity for the application. A chocolate that works well for molding may lay down too much material on a delicate wafer. Compare coating results, not just the cocoa percentage printed on the bag.
Example: If a bakery substitutes a coating couverture with chocolate chips already stocked for cookies, the operator reaches for the old working temperature, but the coating is still too thick and rounds off the wafer’s edge. Raising the heat repeatedly is a poor first adjustment because the new formulation may simply flow differently. Instead, begin with the ingredient label and the supplier’s application notes, and run a small coating trial for each chocolate at the conditions suggested for the coating. Keep the wafer size and dipping motion the same. If the original coating gives the desired shell and the chips remain thick, the issue may concern formulation, not the operator’s ability to hit a temperature.
Use chocolate intended for the application and record added fats separately in the recipe; a description such as pure chocolate tells you less about coating behavior than the formulation and supplier’s fluidity guidance. Quality chocolate still requires a proper process. Our guide to ingredient functions helps identify a formulation change from a processing adjustment.
Choose the temperature curve for your chocolate
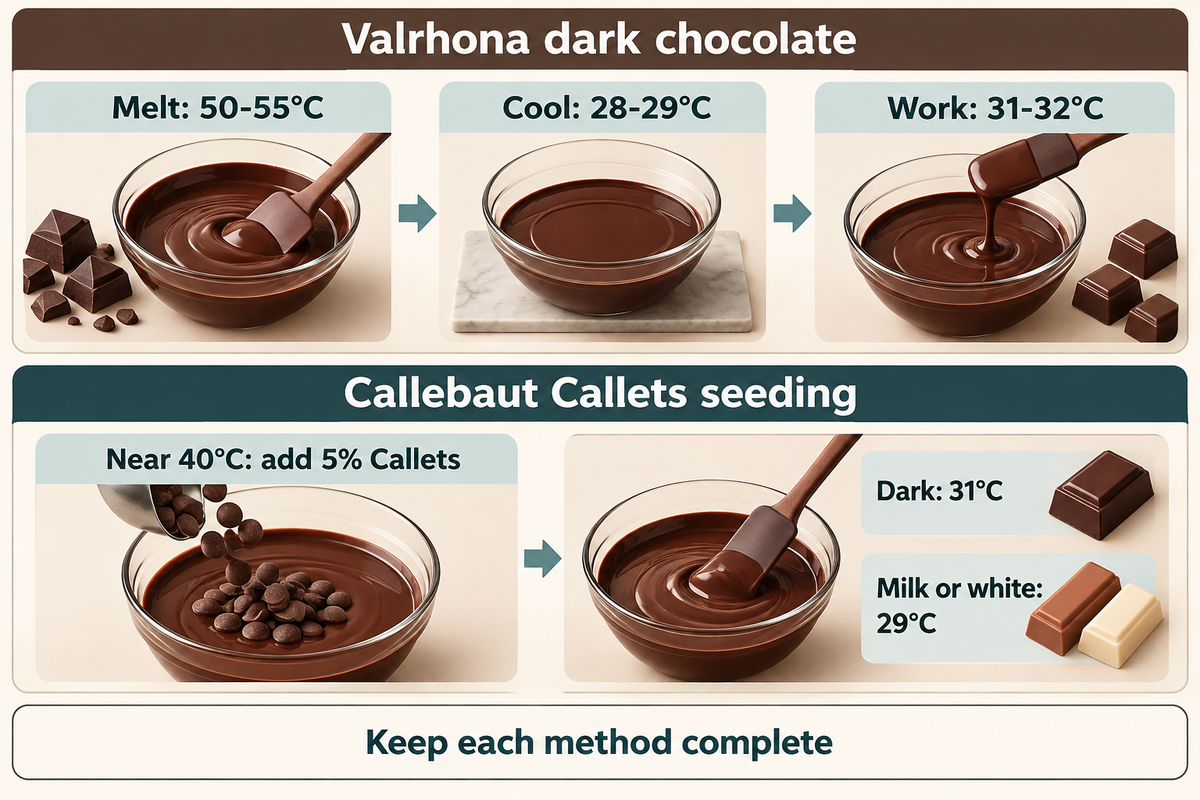
Use one complete supplier method for the selected chocolate. Melt-cool-rewarm curves and a direct seeding method develop crystals differently, so their steps aren’t interchangeable. Measure the temperature of the chocolate after stirring. The heater setting describes the equipment, and the probe describes the material you’ll be working with.
| Method | Melt and develop crystals | Working temperature |
|---|---|---|
| Valrhona dark chocolate curve | Melt at 50–55°C (122–131°F); cool to 28–29°C (82.4–84.2°F), then rewarm. | 31–32°C (87.8–89.6°F) |
| Callebaut Callets seeding | Add 5% Callets to melted chocolate at about 40°C (104°F); stir as the seed melts and the chocolate cools. | Dark: 31°C (87.8°F). Milk or white: 29°C (84.2°F). |
Sources: Valrhona’s tempering chart and Callebaut’s Callets tutorial. Fahrenheit values are conversions. These are named methods, not interchangeable product specifications.
For milk chocolate and white chocolate using a cooling curve, take the melting and cooling limits from the particular product instructions. Valrhona lists working ranges of 29–30°C (84.2–86°F) for milk and 28–29°C (82.4–84.2°F) for white. Do not cross over the dark chocolate melting range to either formulation.
Callebaut’s equipment tutorial starts with a 45°C thermostat setting, then changes that setting for working. Its separate hand-seeding guidance describes adding seed near 40°C. Keep those instructions attached to their measurement points: a thermostat at 45°C doesn’t mean the chocolate reaches exactly 45°C everywhere in the bowl.
A dry probe and spatula help make the measurement repeatable. Stir the chocolate before you check the temperature, avoiding a reading taken only against the heated wall, where local temperature may not represent the batch you’ll use for coating. When melting chocolate in a bowl over simmering water, keep steam and droplets out of the chocolate inside; wipe the bowl’s underside before moving it.
Tempering milk chocolate requires its own temperature limits even with equipment unchanged. Heat chocolate slowly and make sure the chocolate is evenly mixed before adjusting the heater. The goal is to make chocolate behave consistently during coating, having a useful set and enough flow to drain from the wafer.
How to temper chocolate by seeding
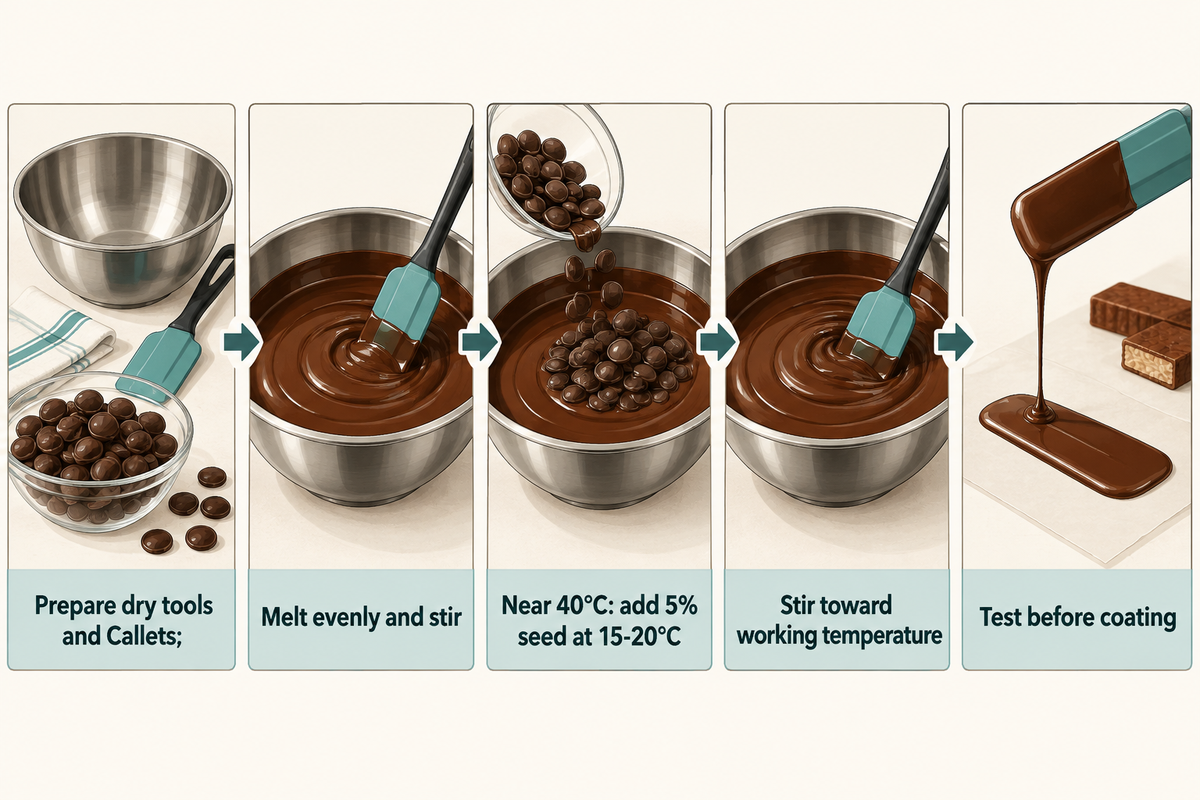
Seeding introduces crystals from properly tempered solid chocolate into melted chocolate. Callebaut’s published Callets method uses a 5% seed addition, with the seed held at 15-20°C prior to use. Stirring distributes the seed throughout the batch as it cools to the working temperature, followed by a thin-film test.
What is the chocolate seeding method?
The chocolate seeding method uses stable crystals in solid chocolate to guide crystallization in a melted batch. Add the seed at the temperature specified by the method, stir it through and monitor cooling. Seed crystals should retain their function long enough to do their job, and adding them to overly hot chocolate can melt them away.
- Prepare the chocolate. Use dry equipment and correctly stored Callets for this supplier method.
- Melt the batch. Heat gently, stirring until the chocolate is melted evenly; follow the product’s melting guidance.
- Add the seed. Near 40°C, add 5% Callets at 15–20°C and stir them through the melted chocolate.
- Reach working temperature. Continue stirring toward 31°C for dark, or 29°C for milk or white, following Callebaut’s guidance.
- Test before coating. Spread a thin sample and assess its set before using the chocolate on the full batch.
The Callebaut seeding instructions are specific to the Callets method. A recipe that melts three-quarters of the chocolate and reserves the rest is a different method. Don’t replace its proportions with 5% seed halfway through or add a cooling step taken from a tabling recipe.
If starting with a bar, chop the chocolate into small pieces before melting, so large pieces don’t slow or prevent even heating. With chopped chocolate, stir between heating intervals rather than waiting for every visible piece of chocolate to melt under continued heat. Make sure chocolate is completely melted at this stage, prior to developing new crystals through the selected method.
Add the seed to the melted chocolate and stir in the batch. Small amounts of chocolate left beside the bowl are to be identified as seed or stock. Don’t add the remaining chocolate merely to empty the bag if that changes the chosen proportion. Stop and test when the working condition is achieved. Prolonged holding can continue changing the crystal population even without an obvious temperature shift.
Test temper before coating the batch
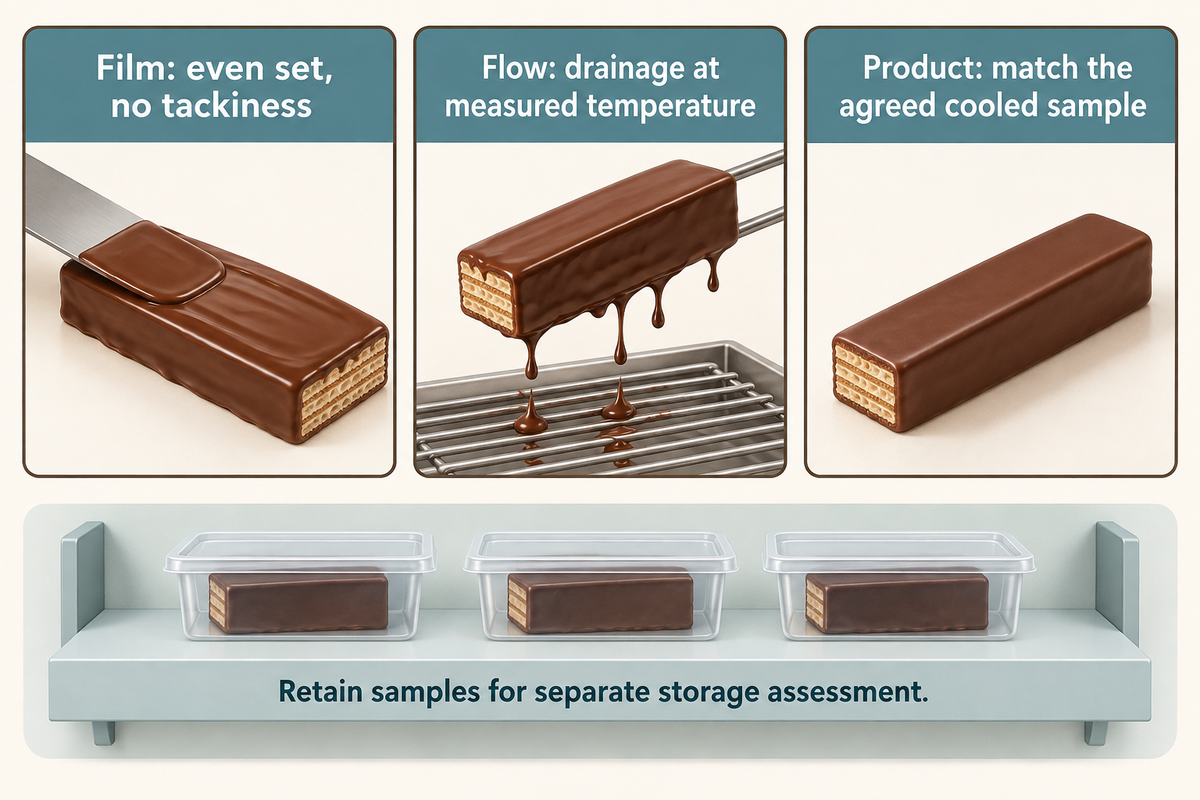
A thin film is to be checked first for evidence of working temper. Even flow is an indication that the batch is able to make the required coating. Test the coating by dipping a wafer and check the filling and cooling conditions.
Peter Greweling places the sample test before viscosity and temperature in his assessment of chocolate tempering. This sequence works when dealing with a reassuring thermometer reading but chocolate that’s difficult to spread. A temperature test should help explain a streaky sample and not override the observation.
3-Check Temper Release Sheet
This record is for use at startup and after any adjustments. Spread chocolate onto a clean sample surface; the chocolate should set evenly under the established test conditions. The operator notes what happens; the quality lead takes the sample and compares the result to the agreed upon product sample. Retain temperature, elapsed set time and coating mass as measured values. In product trials, set the acceptance limits rather than use a universal set time.
| Check | Record | Decision |
|---|---|---|
| Film: material identity | Chocolate product, lot and selected supplier method | Keep the method matched to the chocolate being used. |
| Film: test conditions | Sample surface, room temperature and elapsed set time | Compare samples made under the same conditions. |
| Film: appearance and touch | Streaking, evenness and tackiness after setting | Hold coating when the sample stays tacky or sets unevenly. |
| Flow: material temperature | Probe reading in the stirred batch, separate from the setpoint | Compare with the selected method’s working range. |
| Flow: draining behavior | Drainage from the trial wafer and change since startup | Correct an overly thick batch before it builds a heavy shell. |
| Flow: adjustment history | Heating, pauses and mixing since the previous passing sample | Repeat the film test after a correction. |
| Product: coating pickup | Wafer and filling lot; before/after coating mass | Compare with the agreed shell target on the same wafer geometry. |
| Product: cooled result | Cooling conditions, shell appearance and wafer texture | Proceed when the trial matches the agreed finished sample. |
| Product: retained samples | Storage conditions, inspection dates and later surface changes | Use the storage observations for the separate shelf-life assessment. |
Method basis: Greweling’s sample-first assessment, the 2023 wafer-enrobing study and the European Commission’s PROPRALINE project report.
Example: A dark coating batch starts with a clean film and an acceptable dipped wafer. Later, the thermometer still reads 31°C, but each wafer drains slowly and has a thicker shell. Record the change instead of using the original passing sample to cover the rest of the shift. Check whether the batch is overcrystallized, and make the supplier’s controlled adjustment and test again. If the film looks better, but the wafers still look uneven, move the investigation down to product temperature and cooling. This approach allows us to see any issues with cooling that are being masked by repetitive heating. Our baking troubleshooting guide gives additional context.
Troubleshoot streaks, thickening and bloom
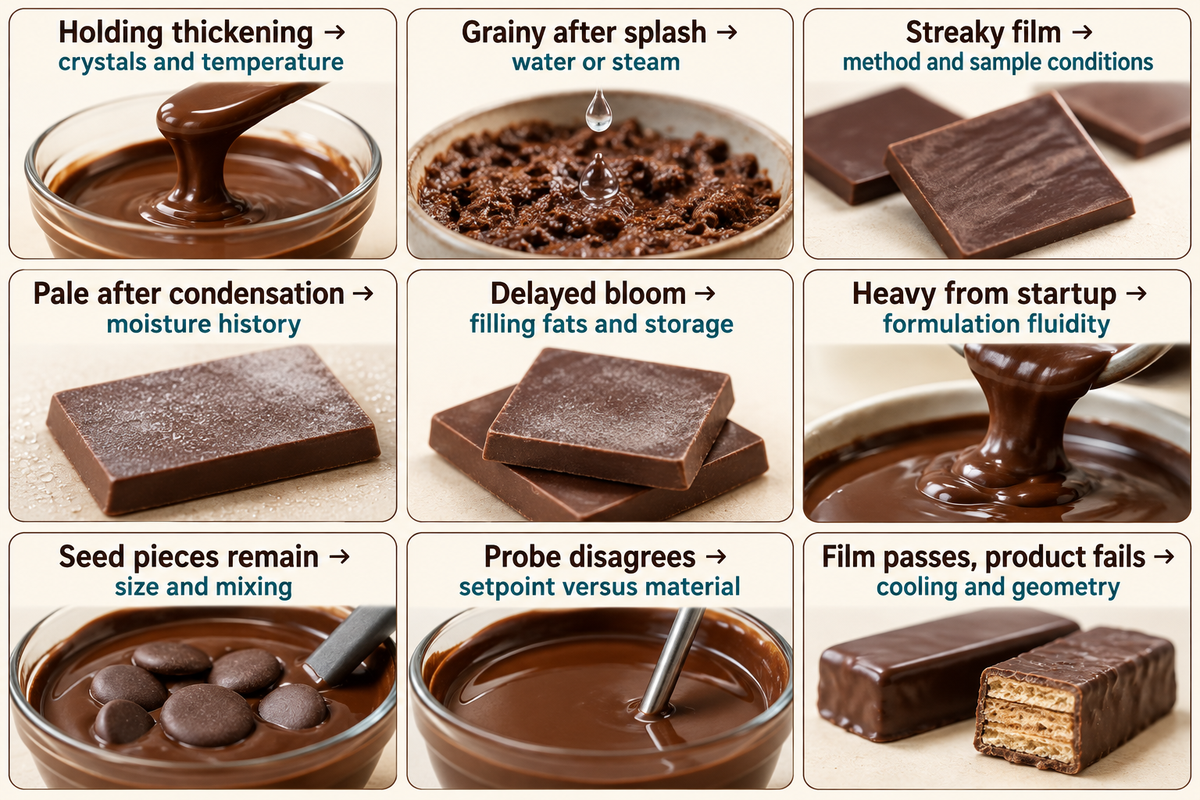
Understand the defect in time before changing the recipe: A suddenly grainy bowl, a slow-setting film and a pale surface after storage require different investigations. Thick chocolate may contain excess crystals, and moisture may cause chocolate to seize. Later bloom is also dependent upon storage and, in filled products, movement of fats.
According to Purdue Extension’s chocolate guidance, sugar bloom results from surface sugar dissolving in moisture and recrystallizing as that moisture evaporates. If the surface is dusty after condensation, investigate moisture exposure and storage conditions. Repeating the original tempering curve without addressing the cause of condensation leaves the issue in place.
| Defect category and observation | First investigation | Action |
|---|---|---|
| Bowl thickens during holding | Temperature and growing crystal population | Use the supplier’s controlled warming correction; retest flow and film. |
| Sudden grainy paste after a splash | Water or steam entering the chocolate | Separate the affected batch; stop treating it as unchanged couverture. |
| Film remains streaky or tacky | Tempering method and sample conditions | Correct the batch and repeat the sample before coating more product. |
| Storage: pale surface follows condensation | Moisture exposure and sugar recrystallization | Review transfer between cold and warm areas before repeating the coating run. |
| Storage: delayed bloom on filled pieces | Filling-fat migration and temperature history | Compare filled and unfilled retained samples through the intended storage period. |
| Formulation: coating is heavy from startup | Chocolate fluidity and application grade | Compare coating mass with the approved formulation before increasing heat. |
| Seeding: solid pieces remain at the working stage | Seed size, starting condition and mixing | Follow the selected supplier method; resolve unmelted seed before coating. |
| Measurement: probe and thermostat disagree | Setpoint versus stirred material temperature | Measure the mixed batch before changing the process setting. |
| Cooling: product differs from the passing film | Product temperature, cooling air and coating geometry | Trial the complete product under its intended cooling conditions. |
Callebaut’s overcrystallization guidance links excess crystals to thick chocolate and coating defects. Gradual warming can reduce excess crystals, but heating chocolate until every crystal is gone requires tempering again. Work in small adjustments. If you place the chocolate back over heat, stir and measure before applying more heat; attempting to thin the batch with water changes the formulation, and seized chocolate may be produced rather than a dipping coating.
A surface photograph alone is a poor method to distinguish between sugar bloom and fat bloom. Examine the history. Water in the chocolate during mixing, condensation after cold storage, or delayed changes around an oily filling indicate different possible causes. Even if you temper the chocolate perfectly at startup, its storage environment can change the surface. Keep affected samples and their process records together.
Apply tempered chocolate to wafers
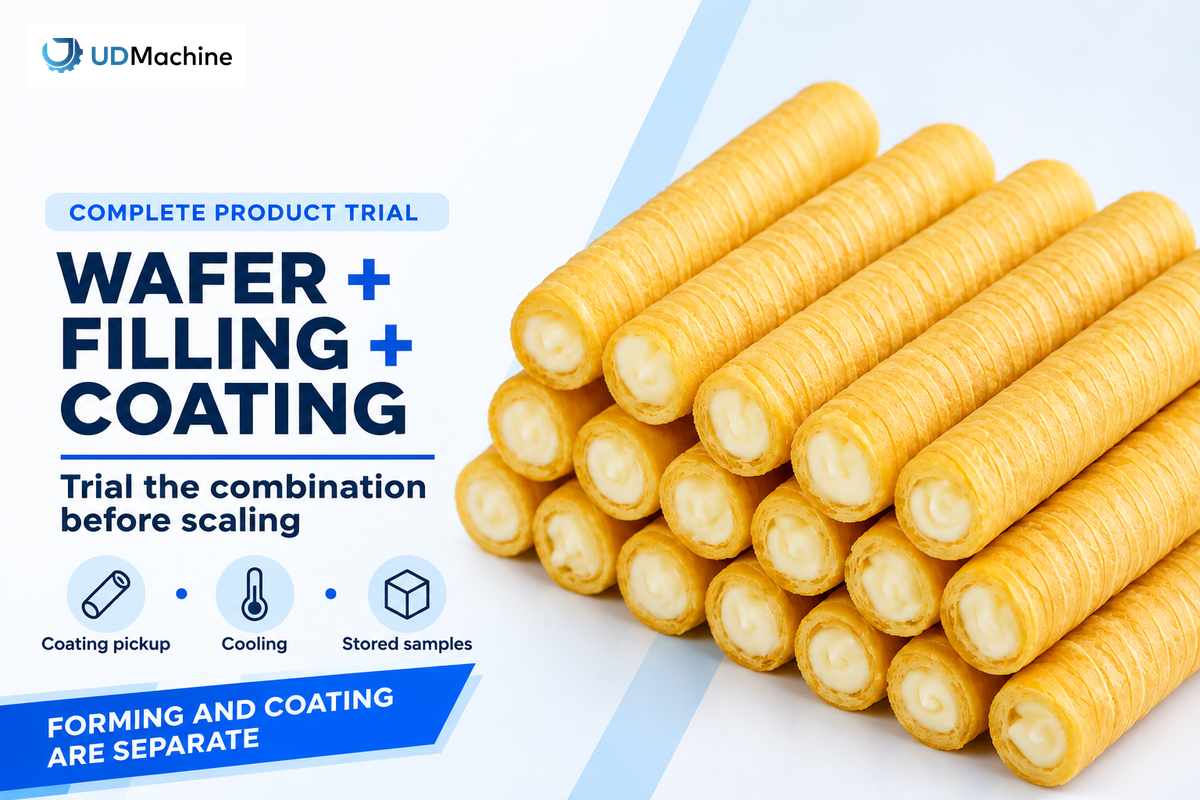
Try the complete wafer, filling, and coating together before increasing output. Tempered chocolate sets around products with their own temperature, moisture and fat content. Coating flow determines shell weight; cooling determines the structure. Filling fats can diffuse into the chocolate shell during storage and alter its appearance.
The 2023 International Journal of Food Science & Technology wafer study reports changes to chocolate flow and the coating mass picked up by wafers, caused by changes made in the formulation. For production, compare the mass of coating on the same wafer geometry, before blaming the tempering machine. A thin shell needs coverage at edges and cut surfaces.
The PROPRALINE project reported that cooling temperature and airflow both impacted chocolate pralines. Their project report outlined what happens in the early period after cooling. The PROPRALINE project outlined how the cooling environment needed to be controlled to support good end results for pralines. Transfer the lesson about controlling the whole cooling environment to wafer trials; establish the wafer’s settings from the wafer itself.
A 2024 magnetic-resonance study of nut-filled chocolate showed the migration of oil into chocolate shells. Retain coated units for a nut-filled wafer and inspect them during the intended storage period. Proper tempering at startup can’t predict how the chocolate around that particular filling will behave weeks later, since oil migration and the subsequent storage conditions will affect the shell after chocolate is cooled.
Choose the product geometry first using our wafer formats and applications guide. Different wafer types require different handling and filling mechanisms. UDTECH wafer roll forming equipment produces a baked and rolled wafer with an optional cream or chocolate core before winding. Plan for external tempering, coating and cooling as separate operations in your line layout.
When a tempering machine earns its place
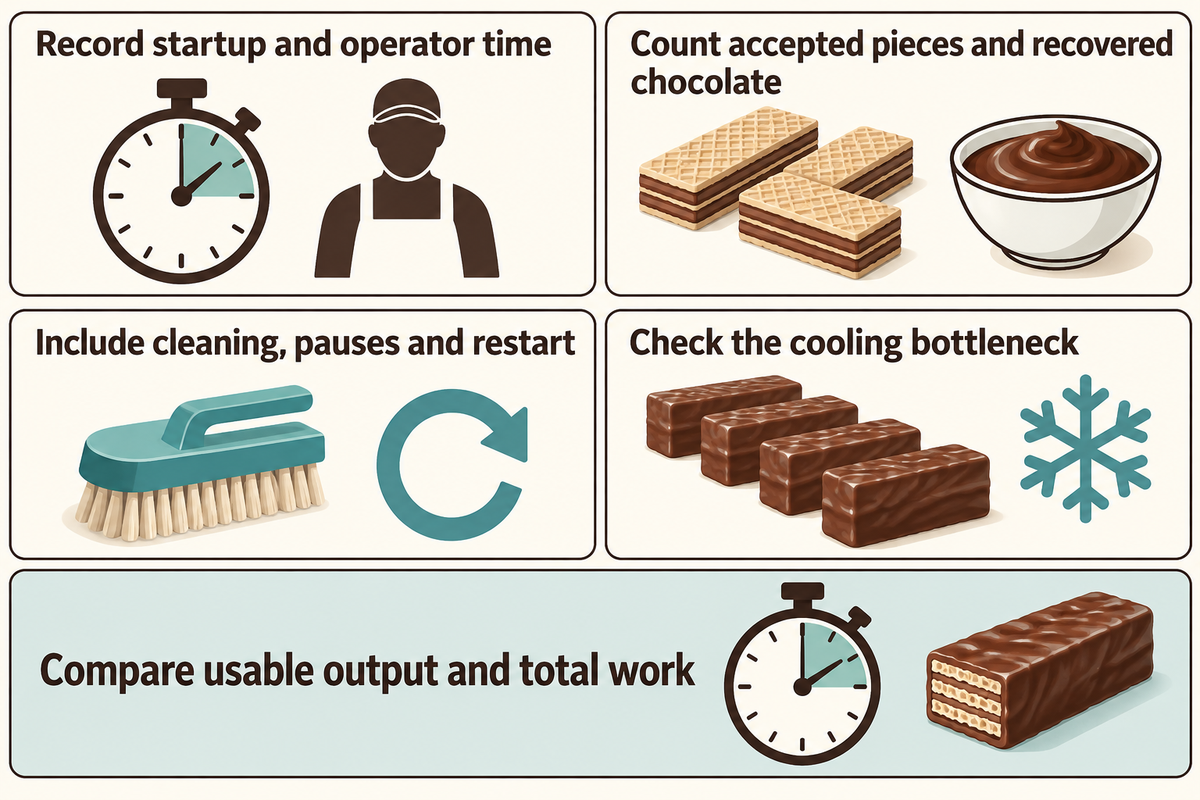
Consider tempering machines when measured holding, stirring, and correction work repeatedly limit coating output. Compare them with the existing process using the same recipe and finished product requirements. Batch size alone is a very poor buying rule. Cleaning and changeovers, flow of coating, and cooling capacity can consume the time the machine was designed to save.
According to the Briggs and Wang tempering study, tempering time and shear affect crystallization and later affect flow properties. This suggests a good trial question: Is the tempering equipment able to hold the chosen chocolate within the operating condition throughout the coating window, including pauses?
Example: A bakery coats one dark product in the morning and one milk product in the afternoon. A larger tempering tank may reduce waiting during the first run, but may leave more chocolate to recover and more surfaces to clean before the second run. The bakery needs usable output during both runs. During the demonstration, write down the minutes it takes to start up, the operator’s attendance, the pieces accepted, recovered chocolate, and the minutes spent cleaning, for each product coated. Include the planned pause before restarting. If the cooling area gets full before the tempering tank gets limiting, increasing the tank capacity won’t solve queueing. Put the observed labor and reject costs next to the complete, end-to-end quotation for the equipment and evaluate the equipment against the total costs.
Send the supplier a wafer product brief detailing your chocolate formula, target shell, filling, and daily sequence. Request a trial covering the planned coating sequence, cleaning and restart. Have quality staff evaluate retained samples while purchasing compares usable output and total work rather than tank size alone.
What changing demand means for batch planning
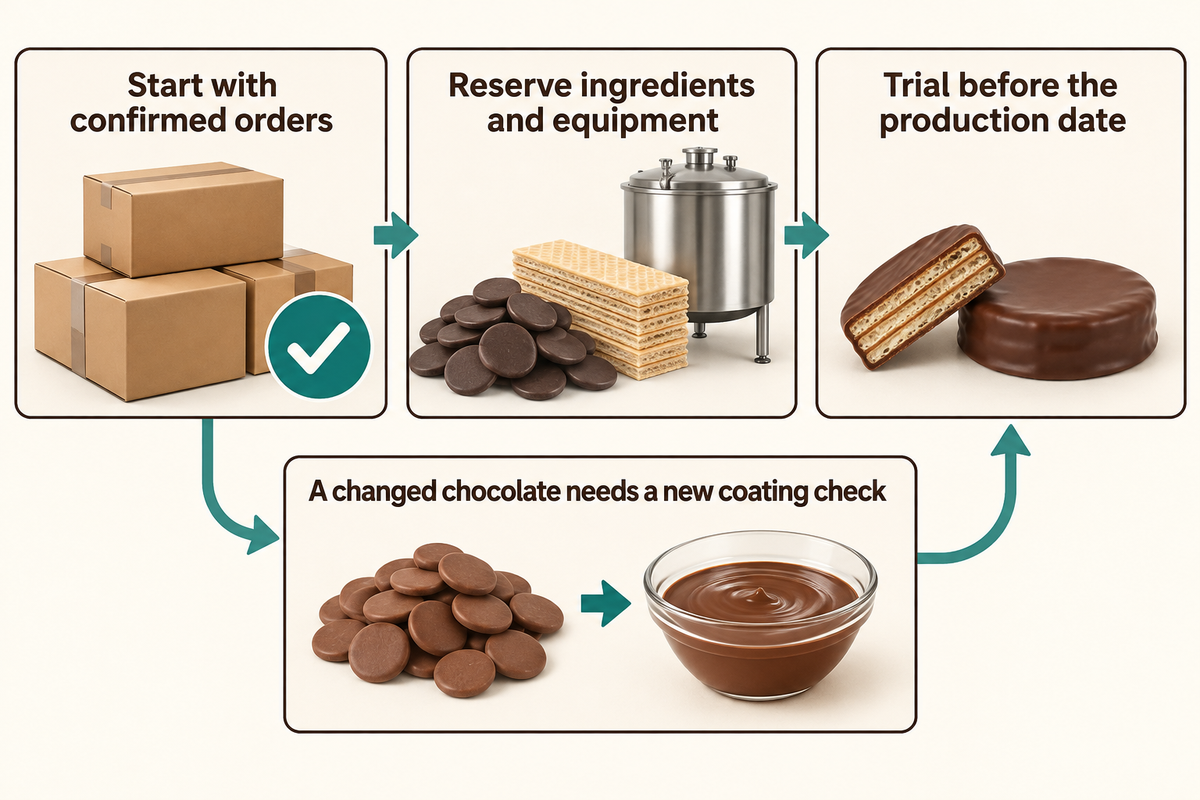
Plan coating batches to coincide with confirmed orders. Seasonal interest in chocolate can help determine when to make products, but staffing and ingredient commitments need the bakery’s own order history. Trial a changed chocolate or filling before the rush to help work out issues related to flow, cooling and storage of the product.
The Centre for the Promotion of Imports (Centre) February 2026 cocoa report, from The Netherlands, describes high prices and living costs, coupled with an uncertain market outlook. Given current conditions, evaluate the bakery’s product mix and accepted output levels before committing to a run. Make that assessment before committing additional chocolate to long coating runs.
It’s a good idea to plan for the chosen chocolate candies or coated wafers, reserve the necessary ingredients and equipment, and schedule product trials prior to the production date. New products, chocolate creations, should be scheduled for product trials before orders are accepted. If a sudden, unexpected need arises to substitute chocolate, a coating run check with the new chocolate is in order, as familiar packaging and the same cocoa percentage don’t ensure similar behavior during coating.
Key takeaway
Release a coating batch through 3 checks: a clean thin-film set, suitable flow at the recorded temperature, and an acceptable cooled product. Retained product samples then support the separate storage assessment.
Tempering chocolate questions
Seeding and tabling are different ways to temper chocolate. A microwave is one possible heat source. Choose a complete method for the chocolate being used, then keep its temperatures and sequence together. If you temper your chocolate in a small bowl, the same distinction between heat source and crystal-development method still holds true.
Can you temper chocolate in the microwave?
A microwave can supply the heat for tempering, but melting alone does not establish temper.
Place chocolate in a microwave-safe bowl and use short heating intervals with stirring between them. Monitor the chocolate rather than relying only on elapsed time. The microwave method still needs the crystal-development step of the chosen process. Use dry tools, then test a thin sample before coating or molding the full batch. Avoid hot spots by stirring thoroughly before measuring.
Can you temper chocolate without seeding it?
Tabling and controlled cooling can develop temper without adding solid seed chocolate.
Both techniques for tempering chocolate require suitable movement, temperature control and a final test. A marble slab removes heat as you spread and gather the chocolate across its surface. It does not replace the rest of the process. Follow a complete method for the formulation instead of combining one guide’s cooling stage with another guide’s working temperature or seed proportion.
How long will chocolate stay tempered?
Working chocolate stays usable only while its crystal population and flow remain suitable; there is no universal countdown.
During holding, the batch can grow thicker even when the measured temperature seems acceptable. Recheck the film and flow after a pause or adjustment. Finished solid chocolate has a different history: storage temperature changes and movement of filling fats can alter its appearance later. Keep the chocolate under the supplier’s working conditions, and assess stored products separately from the liquid batch.
Do you need a thermometer?
A thermometer makes supplier temperature instructions repeatable.
Touch alone cannot reproduce measurements across batches. Pair the reading with a set test, using a clean, dry probe.
Can tempered chocolate be reheated?
Tempered chocolate can be warmed gently, but full remelting requires tempering again.
Distinguish restoring working temperature from melting away the useful crystals. When you reheat the chocolate, follow the supplier’s guidance and test before reuse. Keep the equipment dry and stir between heating intervals. Chocolate already mixed with cream, water or other fats is a changed formulation; treat that mixture according to its recipe instead of applying plain-couverture instructions.
References & Sources
- Stobbs and colleagues: Chocolate Tempering: A Perspective (2025).
- Nature Communications: minor cocoa butter lipids and chocolate structure (2021).
- Codex Alimentarius: Standard for Chocolate and Chocolate Products, CXS 87-1981.
- Institute of Culinary Education: chocolate tempering discussion.
- Valrhona: tempering chocolate temperature guidance.
- Callebaut: tempering with Callets, US tutorial; Canadian seeding instructions.
- Peter Greweling: chocolate tempering, Pastry Arts Magazine.
- International Journal of Food Science & Technology: wafer-enrobing formulation study (2023).
- European Commission CORDIS: PROPRALINE final report.
- Purdue Extension: chocolate guidance, FS-153-W.
- Callebaut: identifying overcrystallized chocolate.
- Nut-filled chocolate oil-migration study: PubMed abstract (2024).
- Briggs and Wang: tempering time and shear study, Journal of the American Oil Chemists’ Society.
- Centre for the Promotion of Imports: European cocoa demand, February 2026 update.
From Wafer Forming to Chocolate Coating
UDTECH supplies wafer-forming equipment. This guide connects that production context with published chocolate tempering methods and research on coating behavior. The release sheet combines public guidance for operators, quality staff and buyers; the examples describe possible production decisions, not UDTECH test results. Bring the wafer format, filling and desired coating to the equipment discussion so each processing step has a defined job.